Thursday, November 14, 2013

Joyful Christmas Day 6

Tonight I went to my monthly Stampin' Up meeting, and this is one of the cards we made:

Wednesday, November 13, 2013

Joyful Christmas Day 5

Today I needed a quick quick card, and what better card to case to day than an extremely simple one on Pinterest (once again, no link to anyone's blog, just the image, so I don't know who to give credit to).  But this took me 3 1/2 minutes, including getting everything out and taking the picture of the finished product. Simple, but totally worth sending out.

I can't wait to get my camera back, all I've had to take pictures with is my phone.  When I see my sister at Thanksgiving, I'll get my camera that I left in her car last month back. 


Tuesday, November 12, 2013

Joyful Christmas Day 4

Well, this morning I had computer issues at work, so instead of waiting until after work to make today's card, I decided to go ahead and clock a lunch break and make my card before the majority of my work day. Today's inspiration card (via Pinterest) can be found here.  Nothing says "Christmas Craft" like loads of red and green glitter. :)  I found Embossing Tinsel at Hobby Lobby several years ago, and it's perfect for this card! I used gold stickles for the stamens and the dots on the sentiment. 
Note to self: Sentiment is 1 1/2 x 2 1/2, mat is 1 3/4 x 2 3/4.
Glitter paper is from K&Company independence glitter set.
And of course, I used Velum for the poinsettia again.

Monday, November 11, 2013

Joyful Christmas Day 3

Someone made a card with what looks like Tim Holtz' Tattered Poinsettia.  I don't know who it was because I saw it on Pinterest, and the person who pinned it didn't link it to a blog or a gallery, just the image itself.  Such a bummer because when I find something that inspires me as much as this one did, I'd like to see more of the artists' work.  

Here is my take on the inspiration card:

This was a very easy card to make.  I took a 12x12 piece of textured white cardstock and trimmed a piece 5 1/2 x 11, and folded it in half.  Then I cut another piece 5 1/4 x 5 1/4.  Then I used my coluzzle and cut a circle in the middle that was just a little bit bigger than the poinsetta itself for the frame.  I embossed "Merry Christmas" from the Petite Pairs set in one corner, and three blings in the opposite corner, and then pop dotted it onto the card.
I stamped the poinsettia on some velum which I bought years ago.  Isn't it great that paper doesn't have an expiration date? lol.  This was a very fast card!

Sunday, November 10, 2013

Joyful Christmas Day 2

Oh, there are so many different ideas for this stamp set on Pinterest, I may be making cards with this set until Christmas (unless I decide to do another set).  I figured out something today.  Yesterday I stamped and embossed 3 times in order to have three layers.  Today I figured out if I use my Fiskars fingertip knife when cutting out the middle, I can use what's left of that stamp/embossing for the bottom layer
 I used the mirrored paper that was in my DCWV Immortal Love Cardstock collection.  I wish I had a whole stack of this mirrored paper. 

 When I add the middle layer, you can't see the empty spot in the bottom layer anymore!

I decided for my sentiment, I wanted a different shape than what I had easily available... I wanted one that was just big enough for my sentiment, "Merry Christmas" from the Petite Pairs set.  I took out my spellbinders, and realized that if I ran the scalloped square shape through the big shot twice, it could become a rectangle.  The key to this working was the magnetic platform for the big kick.  Yes, I know you could also use washi tape and tape the spellbinder to the embossed sentiment, but I'm a little lazy, and the magnetic platform really makes a difference. And of course, I had to add some bling to the middle.  Here's today's finished card:

The card that inspired my creation (and I think is better) is here.

Saturday, November 9, 2013

Joyful Christmas Day 1

Poinsettias remind me of my Grandmother, maybe that's why I love this stamp set so much.  There are so many different ways that this stamp from Stampin' Up can be used.  I had to create a board just for it on Pinterest.  I think I'll see how many cards I can make with this set, won't that be fun?

I used DCWV bright metallics paper, stamped using Versa Mark and used gold embossing powder and on the other one I used Gold tinsel embossing powder. The patterned paper I used is from Bo-Bunny's new Silver and Gold line. After stamping the sentiment with Always Artichoke, I used the Labels Collection Framelits dies and the Paper Piercing tool. After stacking them, I decided to use some metallic thread to pump it up a level. On the other one I used the paper piercing tool to mark places around the label and added stickles.

The inspiration I used to create my cards can be found here.

Sunday, November 3, 2013

Productive Crop

I had a very productive day at the Choo-Choo scrappers' crop yesterday.  I completed almost 10 layouts on my sisters' Scotland scrapbook.  They really want it for Christmas, and I'd like to finish it too :)

Pg 28 Eilan Donan
Pg 29 Eilan Donan
Pg 30 Loch Ness
Pg 31 Loch Ness
Pg 32 Urquhart
Pg 33 Urquhart
Pg 34 Clava Cairns
Pg 35 Clava Cairns
Pg 36 Culloden 
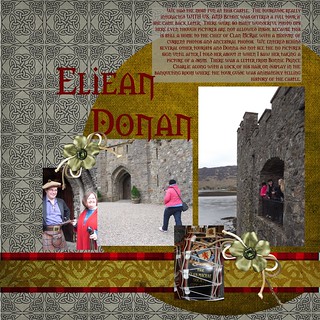
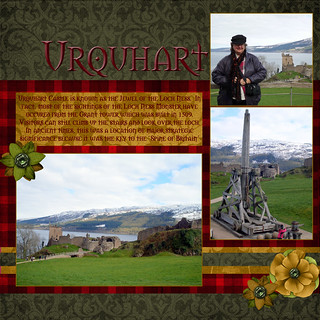
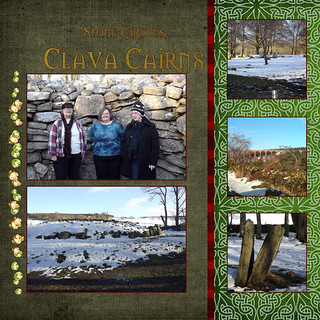
I learned a couple of techniques accidentally yesterday...beveling the text to make it appear 3-dimensional (Urquhart), and how easy it is to create an outline for text or photos (Clava Cairns).