Wednesday, November 7, 2012
Things I am Thankful For mini album
First of all, let me confess: this idea is not original to me, I just tweaked what Cathy Zielske did. You can check her album out here. I fell in love with her album, it is so adorable yet simple. And she has put all the colors and numbers and used adorable graphics, and has figured out all the measurements for you, and has even created a label for the album spine! I can't say enough good things about her album. But there were a few things that I wanted to do differently, so I created my own. 1) Cathy designed her pages for a 6x6 album. I have put myself on a scrap spending freeze, so I can't go out and buy another album. 2) since it's a 6x6 that you print out and then cut, I would be using 32 pieces of white cardstock, and would have a lot of scraps. 3) because it's a 6x6, the photo would have to be cut down to 5x4. No biggie...but I'd rather just have a space for a full 4x6 and cut down on my work.
I have a bind-it-all with lots and lots of binder rings I stocked up on when an lss went out of business, so it was a no brainer to just make my own. I took 1 piece of 8 1/2 x 11 chipboard and 8 pieces of 8 1/2 x 11 cardstock and cut them in half. Then I used my bind-it-all and punched the holes in one end.
Then I took out a well-used collection of paper, Indian Summer by Basic Grey, and cut thirty 1 x 5 1/2 inch strips of paper and attached them near the end of the white papers away from the holes on both sides. There was one piece of cardstock 5 1/2 x 8 1/2 left over which I later used to cut out the title for the front of the book.
Then I used distress markers and made colored lines to hold the journaling for each day, and then used a stamp set I've been hoarding for 5-6 years for the first time to stamp the date on each page.
I can't wait to use it!
Thursday, October 18, 2012
Chevron nails
I have discovered nail stamping and have fun playing with my nails when I find make the time. I love how fun they came out today! If you want to learn about nail stamping, go to dailysomething.com
Friday, October 12, 2012
60's family
After
adding the circles to this page, I decided it needed another thing to
make this special. Sewing is one of my favorite techniques to do
on my pages. Mama taught me to sew when I was little, and it is very
relaxing to me. I have these wonderful flourish templates from Oriental
trading, and too many bobbins of DMC floss to count. As a finishing
touch, I added pearls to the ends of the flourishes. My oldest sister
did the journaling on this page since it was a few years before I was
born.
The paper I used is the Faith stack by Paper Studios, and this is an 8 1/2 x 11 page to fit in my heritage album. I used a one inch circle punch for the circles, and a coluzzle template for the tag.
Choo-choo
Sigh, my son is 15 now, and a head taller than I am, and driving every chance he can now... but he was such an adorable 4 year old!
I stamped a train track, then stamped the train cars and fussy cut them out and pop dotted them onto the track, putting the title on the cars. The smoke was made with a flower stamp, inked once.
I started this layout about 2 years ago, and originally intended on a 2 page layout, but tonight the pictures fell on the page just so...and I decided it was good enough!
I stamped a train track, then stamped the train cars and fussy cut them out and pop dotted them onto the track, putting the title on the cars. The smoke was made with a flower stamp, inked once.
I started this layout about 2 years ago, and originally intended on a 2 page layout, but tonight the pictures fell on the page just so...and I decided it was good enough!
Friday, October 5, 2012
Our Scotland Journey
The prompt today was to tell about your journey, how you get some where or how you do something. This really fit in with what I had intended to do this month, creating a digital album which I would then have printed to present to my 2 sisters who went to Scotland with me in the spring and for my friend who lives there. So, I downloaded the trial version of PhotoShop Elements and then searched the web for a template that would work with what I wanted to do, and then decided to create one from scratch. Then I had to search for tutorials on how to start a blank page, how to add things to it, how to do the masking and clipping, etc. It took me over 24 hours for this first digi layout, but I think I'll be able to do it much quicker next time around. Especially since I created a couple of templates along the way that I like, but wasn't able to use due to the maps I wanted to use. Speaking of maps, that's what took a LOT of the time, creating the maps on google and then doing a print screen, pasting it in paint and then cropping out a bunch of stuff. The digital kit I used is designed by Megan Turnidge, and is available on thedailydigi.com
My sisters really wanted to see exactly where we went and where we stopped along the way. The text on the outside, beginning at the bottom left corner and wrapping all the way around lists our main stops. Not all of these stops are on the week long map in the middle of the page because there were too many for the software; so I broke it down into the main 5 days of driving. The last day we didn't drive anywhere, we just rode the bus into Edinburgh and spent the day there.
There's so much of Scotland I didn't get to see, I'm thinking I need to go back and spend another week.
If you would like to make a map like this with little markers for where you stopped, go to google maps and create the map, then click on 'print screen'. Open the software paint which is on most computers in the accessories folder on the start menu, click on the paste icon and then crop the unwanted items and save the .jpeg
My sisters really wanted to see exactly where we went and where we stopped along the way. The text on the outside, beginning at the bottom left corner and wrapping all the way around lists our main stops. Not all of these stops are on the week long map in the middle of the page because there were too many for the software; so I broke it down into the main 5 days of driving. The last day we didn't drive anywhere, we just rode the bus into Edinburgh and spent the day there.
There's so much of Scotland I didn't get to see, I'm thinking I need to go back and spend another week.
If you would like to make a map like this with little markers for where you stopped, go to google maps and create the map, then click on 'print screen'. Open the software paint which is on most computers in the accessories folder on the start menu, click on the paste icon and then crop the unwanted items and save the .jpeg
Thursday, October 4, 2012
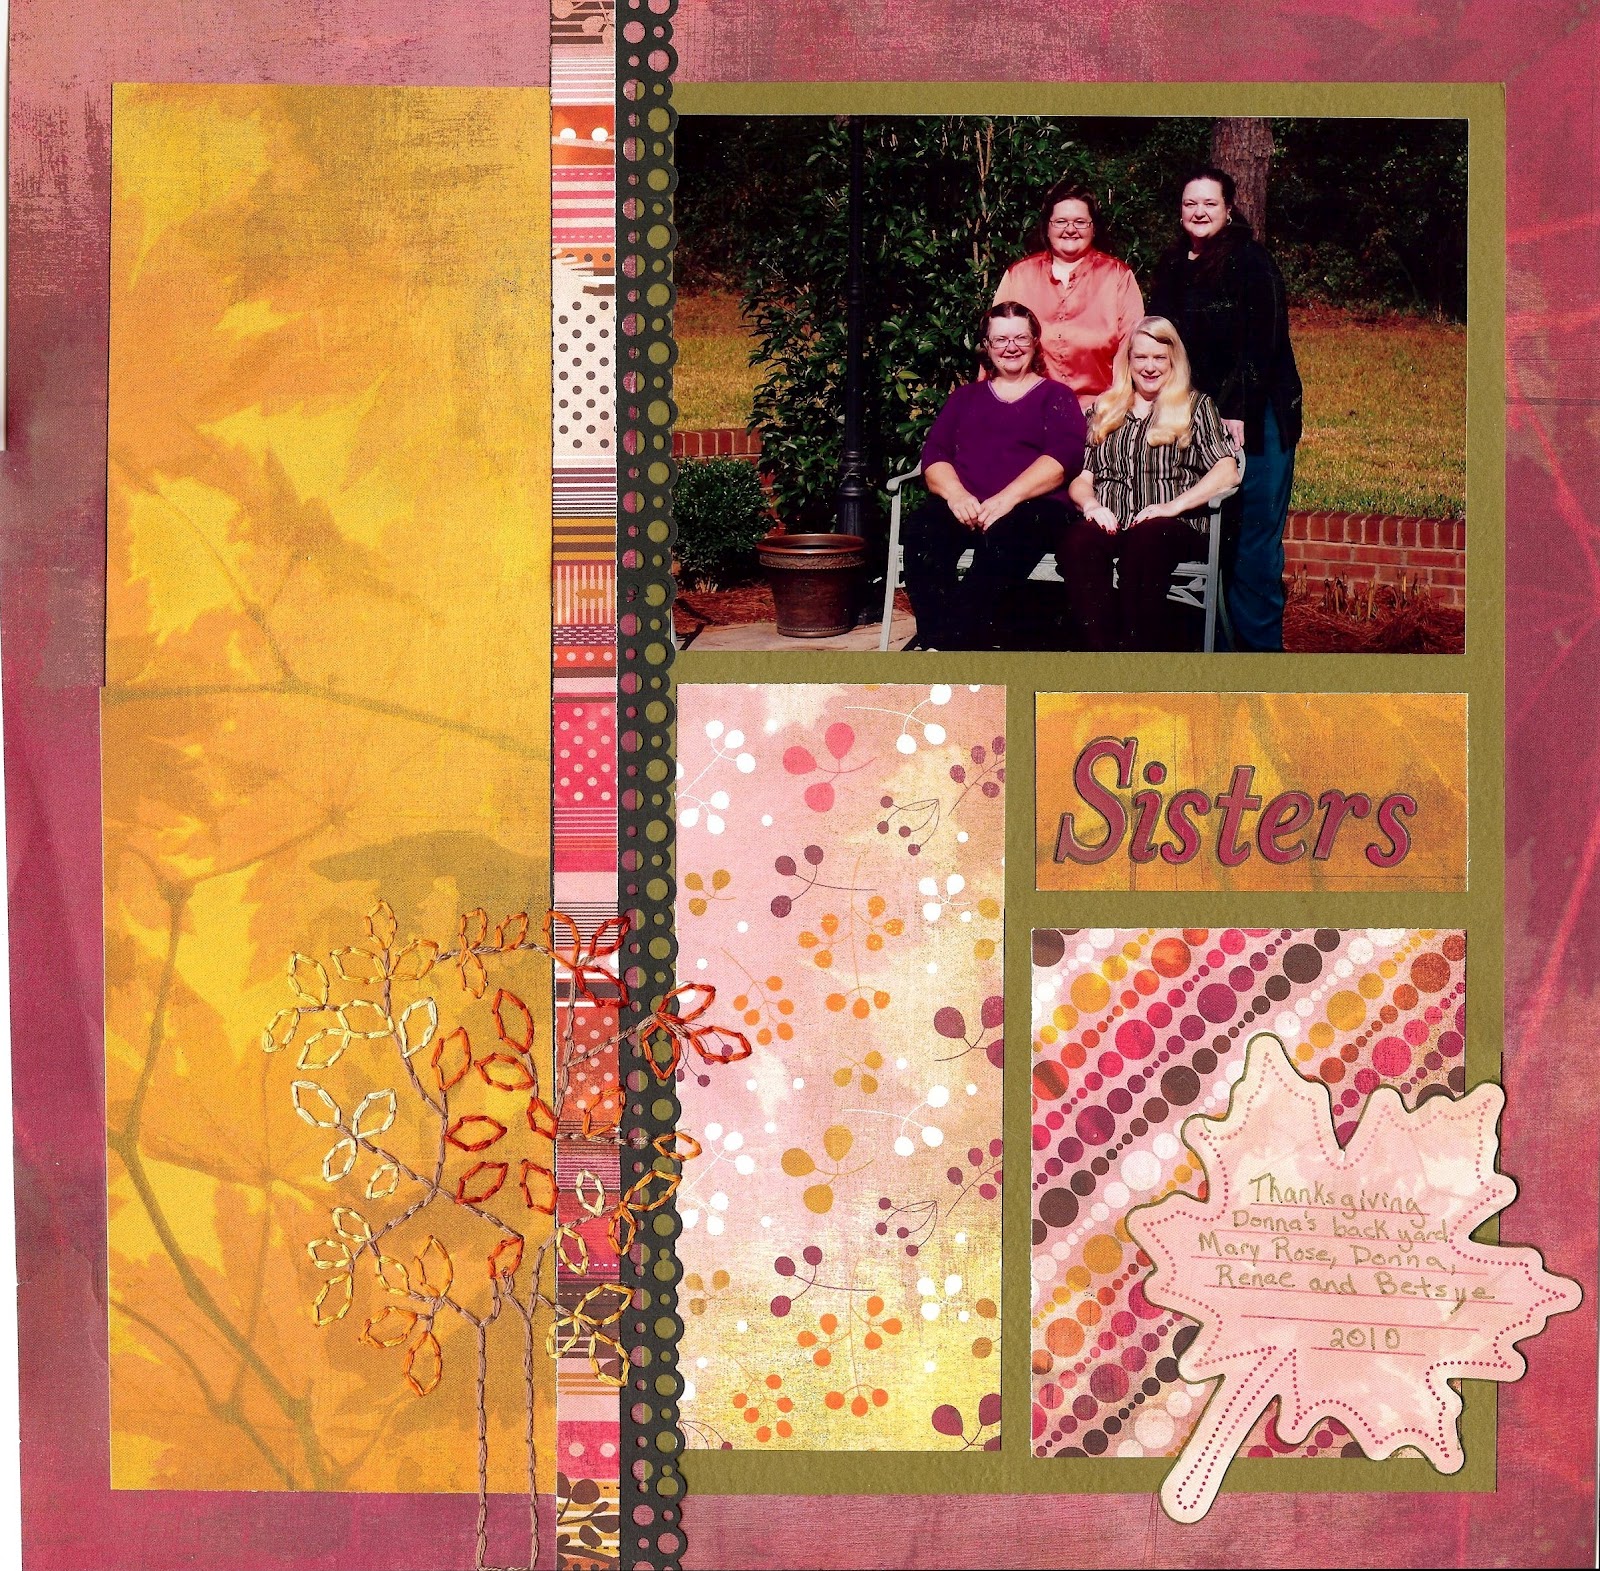
Sisters
So the challenge on the 3rd was to use a color palate from http://theplaydatecafe.blogspot.com/. So I pulled out my mini album of photos to scrap, and debated between 3 different items. I finally settled on this picture. A couple of Thanksgivings ago, we went to Donna's house and decided that since all 4 of us were there that we should take a group photo shot by her pool. And it just so happens that the color palate went so well with Basic Grey's Indian Summer, BONUS!
Since there was only one photo to go on the page, I decided that a wow factor was needed. Yes, the papers would be good, but I wanted something else. I bought a stitching template from Oriental Trading a few years ago with a tree on it. Last year I came up with the brilliant plan to use some variegated thread to make this a fall tree, I cut a piece of cardstock and stitched the tree, and it was so pretty! But then I tried to add it to a page. Because I stitched it on plain white cardstock, the eyes were drawn to that and the photos took second stage, totally not cool. I wound up mounting it on a card and mailing it to a friend who would appreciate the hours spent on one card. I've been trying to figure out how to put this tree on a layout as I had originally planned without the tree taking center stage. I think I've figured it out. I didn't mount it on anything, just stitched directly onto the page. Now I think it might blend into the page a little too much maybe...
or maybe if I had done the brown a darker brown... now, that's something I can easily change with a marker. :)
Since there was only one photo to go on the page, I decided that a wow factor was needed. Yes, the papers would be good, but I wanted something else. I bought a stitching template from Oriental Trading a few years ago with a tree on it. Last year I came up with the brilliant plan to use some variegated thread to make this a fall tree, I cut a piece of cardstock and stitched the tree, and it was so pretty! But then I tried to add it to a page. Because I stitched it on plain white cardstock, the eyes were drawn to that and the photos took second stage, totally not cool. I wound up mounting it on a card and mailing it to a friend who would appreciate the hours spent on one card. I've been trying to figure out how to put this tree on a layout as I had originally planned without the tree taking center stage. I think I've figured it out. I didn't mount it on anything, just stitched directly onto the page. Now I think it might blend into the page a little too much maybe...
or maybe if I had done the brown a darker brown... now, that's something I can easily change with a marker. :)
Tuesday, October 2, 2012
Memorabilia
Today's LOAD challenge is to use memorabilia on a page. I reached into my memorabilia drawer and there were tickets from Biltmore, a piece of pink cast from where Mishal broke her arm 6 years ago, tickets to the aquarium, Harry Potter, hotel key card, tickets to Daytona speedway, and bracelets from several events. The items that I knew I had pictures for were the Nickelodeon hotel and the Daytona speedway. I found the pictures and decided that the one to scrap today was the Nickelodeon hotel. I pulled some stickers that I bought JUST for this page, then I had to decide on the paper... decisions decisions decisions. But when I came across the snorkel collection, I knew it was the perfect paper.
Subscribe to:
Posts (Atom)